Hi there,
This is a short step by step tutorial for Allegorithmic’s Substance plug-in.
Part 1 – Basics (Classic Workflow – for Render Engines)
You have to update the plug-in (Maya line, the big blue buttons to the right 🙂 ).
Activate the Substance plug-in (Windows->Settings/Preferences->Plug-in Manager).
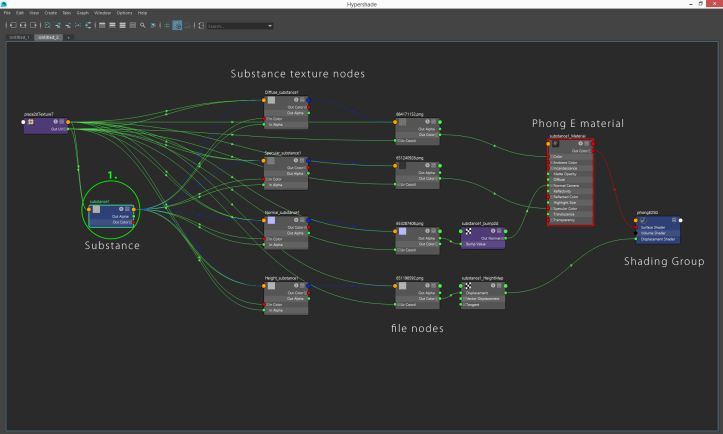
- Create a Substance node in the Hypershade editor.
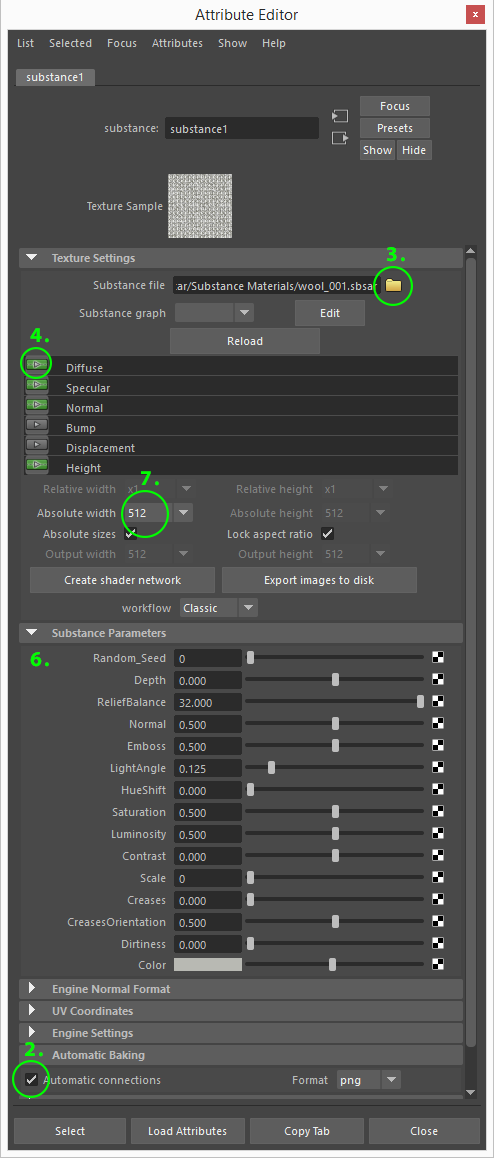
- Turn on the Automatic connections (Automatic Baking section).
- Load a Substance file. Sometimes the loaded substance doesn’t show in the Attribute Editor. Deselect and reselect the Substance node. 🙂
- Click the little play buttons in the list. Substance procedural textures and the connected file nodes are created, also a Phong E shader with the possible connections.
- Connect the generated file nodes to your render specific material and forget the Phong E.
- Change the Substance Parameters. The textures update automatically.
- If you choose higher resolution the texture generation may take a while. Be patient. 🙂
Color management in general:
Always use Maya’s Color Management System.
Color Space settings for file nodes:
- Use sRGB (aka gamma 2.2 – roughly) if the texture directly defines the color of the surface (Diffuse, Base Color, Albedo, Specular etc.).
- Use Raw (aka Linear, aka gamma 1.0) if the texture contains data that does not define color (Roughness, Smoothness [aka Glossiness], Metalness, IOR, Normal, Height, Displacement, etc.).
- If you convert your textures to Raw (linear space) – like with Arnold’s .tx converter – you have to use Raw of course.
Important Displacement map information:
Use the generated Height maps instead of Displacement maps, because it works with Normal maps default settings (Substance Parameters)! The height map automatically connects to the Phong E shader’s Shading Group node.
Exporting textures:
- The automatically generated textures are created in a Temp folder. When you are satisfied with the results it is usually a good thing to bake the final versions into a specific folder.
- Use the Export images to Disk button.
- Set the path, the format and the resolution.
Part 2 will be a short tutorial about Diffuse/Specular/Glossiness and Albedo/Metallic/Smoothness materials and Substances.
Cheers, D


